This month's main kit from My Creative Scrapbooks contains so many beautiful floral die-cuts and chipboard pieces from Carta Bella's Spring Market collection, and one of my favorites is the pitcher of flowers. Recreating a similar pitcher, super-sized, and to have this as the centerpiece of a scrapbook page was what I set out to do.
First I needed to sketch out a pitcher. It wasn't as difficult as you'd imagine! I used a ruler for the straight lines and free-handed the rest, albeit with lots of eraser marks, as I adjusted the size and height to fit the paper and my page.

Here it is cut from the sketch and placed on the black and white print I intend to use for the pitcher:

Next I turned over the paper and traced my template on the reverse side, so that I could better see the pencil marks when cutting. Remember to flip your template too, unless it doesn't matter which way the spout is facing.

The lines show up much better on the lighter colored print, making it easy to follow with my scissors.

Here is the pitcher, cut and flipped to the desired side:

And here are the flowers that will eventually come together to fill it:

But first, the pitcher needs a little white highlight with dry-brushed gesso. To achieve the light effect, I loaded my brush with gesso, then brushed most of it off on a paper towel, before lightly swiping the paper, following the lines of the pitcher. I repeated this until I was satisfied with the look.

And now, for a fun background, using a mix of watercolors and gelatos. I had my handy chipboard flower arrangement nearby as a model, as I was attempting to bring in those same colors of pink, peach and yellow to my paper.
First, I brushed sections of waxed paper with various colors, being careful not to mix and muddy them up.
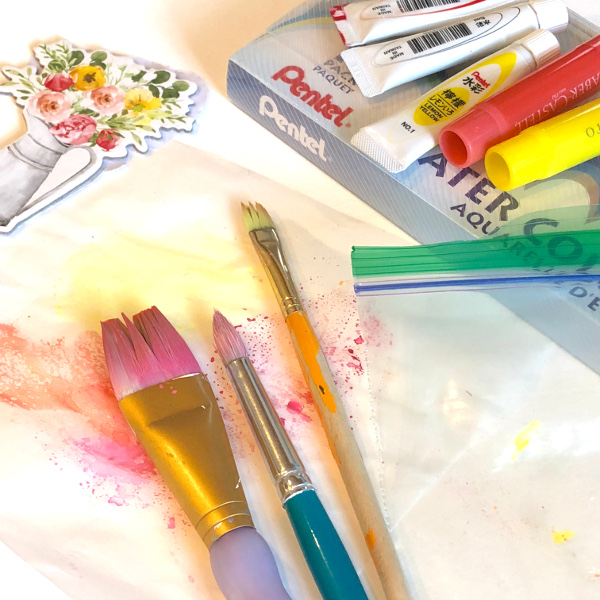
Then I smooshed a clear baggie over the waxed paper to pick up areas of color, and transferred it to a plain white cardstock. I smoothed and smeared and re-smooshed until the center of my background looked like this:

And now I don't want to cover it up! lol.
But onward I go, adding the pitcher, button-centered flowers, and bits of greenery to fill in the spaces, tying on the tag, adding my title, and finally backing with pink cardstock.

I originally imagined this page would hold a photo of my plant-filled kitchen window, but I forgot to add it to my print order! Guess what? I think I like it just fine as a decor item. Eventually I'll get that photo printed and add it to the page. Meanwhile this happy spring scene will sit on my easel and brighten my workspace.


