Thursday, December 26, 2019

Out Chasing Rainbows

When life gets hectic, scrap lift! Yes, I've become a scrap lift aficionado. Taking inspiration from a well designed page is a great way to get busy with paper!  

This page is inspired by a Scraplift Sunday page on the Paper Issues blog and Instagram. I LOVED the concentric circles design. I have plates; I can trace and cut their outline...LOL! But before I got out the dishes, I noticed that the PI Store had a cut file created for this very challenge. 
What could be easier?!


I used ALL the bright papers, rainbow embellishments and colorful vellum leaves for this one! 


I also noticed that the scraps from this project could be assembled for more eye-catching circle-designed pages. How cool!

Thursday, December 12, 2019

That time the movie people came...

Do you love snow globes as much as I do?! Shake them up and you have your own little snowfall, any time you like. Here in south Louisiana it's probably the only bit of snow we'll see this time of year...or ANY time of year! So I was particularly excited to be able to create my own snow globe out of paper. I began with a woodgrain base, added a blue sky background circle, fussy cut house and wood veneer snowflakes, then embellished it all with glittery fiber and a layered paper flower. So fun!


What's really fun is the story this page tells...that time the movie people came to tour our house, location scout, producer, director, and someone else. It was about a week before Christmas when we got a postcard on our door. I was immediately skeptical:


After checking with the Film New Orleans commission, I got back in touch with the location scout and made an appointment for him to show our house...the next day! YIKES!


While we weren't chosen, I was still so very happy to have a sparkly clean home for Christmas! (All except my scrap space...sigh.)


Saturday, September 1, 2018

Use Those Journal Cards (A Step-By-Step for MCS)


(This tutorial was first published on the My Creative Scrapbooks blog.)

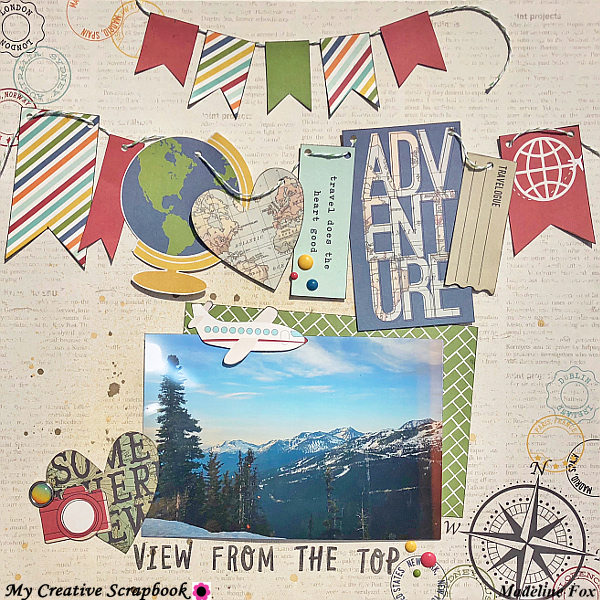
Today I'm sharing a fun travel page, assembled using the July main kit from My Creative Scrapbooks. And believe it or not, the page was created with only two sheets of patterned paper: one for the background and a second for everything else!


Now I'll tell you exactly how I did it!

First, I gave my background a little spritzing with 2 colors of mist-one light, one dark:


Then I strategically cut a rectangle slightly smaller than my photo, in the exact spot where I would place the picture.

I placed my photo exactly where I wanted it to end up and pencil marked its outline:


Then I cut inward approximately 1/4 inch from the pencil marks, removed and flipped the rectangle of paper:


Now I had a rectangle of green print, the reverse of my background page. I thought it would make a great photo mat, but, being slightly smaller than the photo itself, I needed to place it off-center or somewhat askew as shown below:


Next it's on to fussy cutting. The sheet of travel journal cards holds so much potential; they just needed to be set free! So, after cutting apart each of the rectangles, I fussy cut various elements from them: the globe, heart, airplane, and camera. Then I created banners from some of the other pieces. 


 As you can see, even the smallest of scraps came in handy for the upper banner:


When I cut apart the map-print heart and phrase below it, I was left with a stencil which I used to cut a second heart for my page:


With baker's twine, I assembled my banners, gluing the flags on the upper banner, but punching holes and threading the twine on the lower one. Other details were added, including the fussy cut airplane and enamel dots.


 That second cutout heart became part of a cluster that overlaps the photo:


And finally, a title was created with the kit's alphabet stamp set:


Here it is again, all from two sheets of paper and elements from My Creative Scrapbooks July main kit. 


Sunday, July 15, 2018

Boy Pages from the MCS June kit

So many patterned papers have pink...and flowers. Not really a problem when scrapping myself, except I also scrap boys: grown up boys, and an almost grown up (teen) boy. So this is how I handled creating two "boy" pages with a recent My Creative Scrapbooks main kit.

For the first, I went with a black, white, and yellow color scheme. I splattered white cardstock for my background, cut leafy wreaths (a My Creative Scrapbooks cut file) from off-white cardstock, used two patterned papers from the kit and added ticket stubs from my stash. The music-themed washi tape wrapped around the wood veneer jar added another touch of black. Finally-a white on white title. It's more minimalistic than some of my pages...but I LOVE it! These colors worked so well with my photo!


The second page, is truly monochromatic. Light blue, dark blue, any shade of blue was welcome here. And blue of course worked perfectly with a photo of my swimmer doing "what makes his soul happy"! Again I used mist to transform plain white cardstock for my background then cut papers into strips and banners, adding enamel dots and fussy cut clocks. A simple title from the kit's pack of Thickers completes the page.


Til next time...


Love My Life-Step By Step-MCS June Kit


My idea for this, the first page that I created with My Creative Scrapbook's June main kit, was to piece together a quilt-like center portion from all the beautiful patterned papers in the kit. But first, I created a background with a bit of spray and several splatters of mist on white cardstock:


Next I cut 2-inch squares from the patterned papers that I chose. A paper punch would have made this so much easier! ;)


I also wanted to use a couple of thin strips from this paper:


Specifically, these. (You'll see!)


 Here are my strips and squares, inked and arranged in the center of my background paper:


After adhering my photo to the upper right hand side,


I began my title on the lower left, using a wood veneer word from 1Canoe2,


then finished the phrase with Thickers (all included in June's main kit):


Layered chipboard pieces enhance the title,


and add dimension to the page elsewhere:


One of the patterned papers in the kit was made to be cut up into journaling blocks, embellishing strips and 2x3 inch cards. Here's how I chose to use them:


Fussy cut butterflies and enamel dots along with the words cut from the cards make a cute little cluster next to my photo:

The cut out phrase from one of the 2x3 cards was the perfect size for a banner:


The end result: a pretty uncluttered page. I actually find that I LIKE the white space along the top and bottom! Eventually, I 'll add a little journaling to the bottom left...when I think of what I want to say! ;)


And there's the finished page!


Saturday, May 26, 2018

Welcome Spring Step-By-Step


This month's main kit from My Creative Scrapbooks contains so many beautiful floral die-cuts and chipboard pieces from Carta Bella's Spring Market collection, and one of my favorites is the pitcher of flowers. Recreating a similar pitcher, super-sized, and to have this as the centerpiece of a scrapbook page was what I set out to do.

First I needed to sketch out a pitcher. It wasn't as difficult as you'd imagine! I used a ruler for the straight lines and free-handed the rest, albeit with lots of eraser marks, as I adjusted the size and height to fit the paper and my page.


Here it is cut from the sketch and placed on the black and white print I intend to use for the pitcher:


Next I turned over the paper and traced my template on the reverse side, so that I could better see the pencil marks when cutting. Remember to flip your template too, unless it doesn't matter which way the spout is facing.


The lines show up much better on the lighter colored print, making it easy to follow with my scissors.


Here is the pitcher, cut and flipped to the desired side:


And here are the flowers that will eventually come together to fill it:


But first, the pitcher needs a little white highlight with dry-brushed gesso. To achieve the light effect, I loaded my brush with gesso, then brushed most of it off on a paper towel, before lightly swiping the paper, following the lines of the pitcher. I repeated this until I was satisfied with the look.


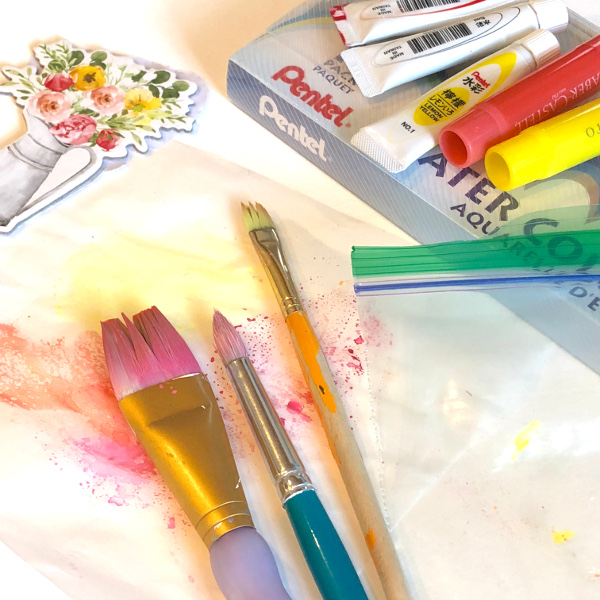
And now, for a fun background, using a mix of watercolors and gelatos. I had my handy chipboard flower arrangement nearby as a model, as I was attempting to bring in those same colors of pink, peach and yellow to my paper.

First, I brushed sections of waxed paper with various colors, being careful not to mix and muddy them up.


Then I smooshed a clear baggie over the waxed paper to pick up areas of color, and transferred it to a plain white cardstock. I smoothed and smeared and re-smooshed until the center of my background looked like this:


And now I don't want to cover it up! lol. 

But onward I go, adding the pitcher, button-centered flowers, and bits of greenery to fill in the spaces, tying on the tag, adding my title, and finally backing with pink cardstock.


I originally imagined this page would hold a photo of my plant-filled kitchen window, but I forgot to add it to my print order! Guess what? I think I like it just fine as a decor item. Eventually I'll get that photo printed and add it to the page. Meanwhile this happy spring scene will sit on my easel and brighten my workspace.

Monday, May 7, 2018

Pinnacle Party

Today I'm sharing another page from the April main kit from My Creative Scrapbooks, and this might be my favorite. I started with a grass green splatter and smear background. Really high tech! ;)


Then added my matted photo and this pretty "Celebrate" tag, whose colors and flowers inspired the arrangement at the bottom of the page.


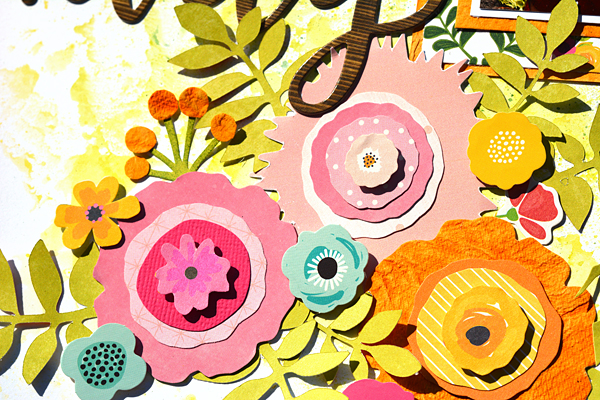
Die-cuts from the kit were combined with cardstock and patterned paper to create large layered flowers, accented by additional die-cuts, stickers, and several leaf clusters.


At some point I noticed the grasshopper on one of the Patio Party collection papers. (He did a great job of blending in; nature's camouflage is pretty remarkable!) Of course I had to add an oversized grasshopper to my bouquet, cutting him freehand from the same paper from which I cut the leaves.


"Party this way!" he says.

Thanks for stopping by. I'll be sharing my pages from My Creative Scrapbooks' May main kit, so check back next week.