Showing posts with label October Afternoon. Show all posts

Thursday, August 4, 2016

Catching Waves & Rays

It's Throwback Thursday! The photo on the layout below was taken several summers ago, and I can't believe how much those three have changed. The two on the right passed me up in height quite a while ago. The one on the left is getting ready to head off to college! But on this day, the three cousins were getting ready for a day on the water, "Catching Waves & Rays".


Patterned papers are from October Afternoon's Summertime collection.


I'd love to have the three cousins recreate this photo one day. In fact, I'm going to put it on my to-do list for next time we all go to the beach!

Monday, September 15, 2014

The Scrappy Blog Tour

Hi everyone! If you're a scrapbooker, you must have heard of the Scrappy Blog Tour that's weaving its way across the scrappy blog world. Well...like the ALS Ice-Water Challenge, I thought if I just laid low and stayed quiet long enough, no one would take notice and it would pass right over me! LOL...just kidding! I am extremely honored to have been asked to participate by my uber-talented scrappy friend, Monique Liedtke. 

Monique has recently joined the Scraptastic Kit Club Design Team, and has all sorts of other credits to her name. She is so very creative, with a gallery full of colorful and beautifully designed layouts, cards, and paper craft projects. Check out her blog, and find her work over at Studio Calico.


Monique has given me several questions to answer. I hope you enjoy reading a little about my process, style, and favorite products!


1. What am I working on right now?


Right now, I'm putting together a fourth project with Scraptastic's The Girl kit for September. I've decimated my favorite patterned papers in the kit, with just bits and pieces left. To get those lovely little bits onto this page, I'm having to be a bit creative!  

After that...who knows?! I'll look through my most recent envelope of photos to see if there's a story that needs to be told...before I forget too many of the details. ;)

2. How long does it take me to create a project?


A long time. A very long time. The sun rises, sets, and rises again. Seasons change. Really...I am a ...s...l...o...w... scrapper.


It generally takes me 2 days to complete a project, often in fits and spurts. I mean, hey, I have things to do (carpool, grocery shopping, cooking, cleaning, a part-time job, swim meets, etc.) AND I get distracted easily! I'll run to the computer to find a cut file or quote and end up lost in cyberspace...or Pinterest. Yikes!


3. What are my favorite things to create with at the moment?


Ahhh...there are so many, and yet no one thing shows up consistently on my pages...except patterned paper. That has to be my most fave supply of all! But here are 5 more that I love to add to my layouts:


BINGO CARDS, JOURNALING CARDS, TICKET STUBS
(And other paper ephemera)


CHIPBOARD FRAMES


WOOD VENEER


ROUND THINGS
(Bottlecaps, die-cuts, brads, labels, buttons, flair, and enamel dots)


WASHI TAPE 


4. How does my writing/creative process work? 


I usually start with product...a paper collection or kit that draws me in. Then I go through my ever-growing stack of photos. I'll try to match up favorite photos or those with stories I'm dying to tell, and work my way from more recent to anywhere in the past. Since I didn't start to scrap until after my 5th child was born, I've got lots of photos from which to choose! 


5. How do I become inspired and stay inspired?


This is an easy question! Every scrapper who posts to galleries, blogs, etc. is a source of inspiration. They inspire me to attempt new techniques and try on different styles. I am also immensely inspired by the products themselves. Who doesn't want to tear into a brand new kit or use those cute flair? And whenever I'm at a loss of where to start, I peruse Pinterest, careful not to get overwhelmed. Quilts and art can also be that spark.


6. What is my signature style?


Ooooo...and now a hard question! Scrappy friends say they can spot my pages a mile away, but I'm not sure if my style has a name. I like to call it organized collage. I love to layer and cluster, adding bits and pieces of ephemera here and there, but I am also drawn to straight lines, grid designs, and orderly pages. Even when I'm being "messy", I like it "just so". Imagine that! 


This is a favorite from this past year:


Here are a few more that give an overview of my style. What would *you* call it?


If you've stuck with me so far, I thank you immensely! 


"TAG!...You're it!" And now it's my turn to pick someone who inspires me to continue with this Scrappy Blog Tour! I've asked Susan Stringfellow and she has graciously accepted. I've known her for years, and am always in awe of her constant stream of creativity! Seriously, it never stops...so I'm very interested in hearing her answers. 

Check out Susan's blog next Monday morning for a peek into her scrappy process. It should be fascinating! Meanwhile, stop by her inspiring sketch blog and find her work in these galleries: Scrapbook.com, Scraptastic, and Disney Scrappers.

Friday, September 5, 2014

Paper Issues Link Party

Paper Issues is having a link party going on until September 14th, and by linking up a layout that fits any of the following categories, you have a chance to win a goodie bag of Jillibean Soup products!  

Okey-dokey...I love Soup! ;)
  • Show us your mad fussy cutting skills.
  • Use scissors or sewing notions as embellishments, maybe even sewing-themed paper.
  • Use die cuts of all kinds — pre-made, from a manual die cut machine and/or an electronic machine. Be sure to check out the wonderful Jillibean Soup cut files in the Silhouette store.
  • Put the focus on your journaling.
  • Share a family story that's been passed down from generation-to-generation.
  • Are bedtime stories part of the nighttime routine in your house (as in "tell me a story")? Is there a favorite, one you read over and over and over?
  • Show us memorial pages about loved ones who are no longer with us.
  • Create a layout that's all about you (as in "all about me")
  • Use Jillibean Soup products.


I found a few contenders, and linked the following for its focus on journaling. It caught their eye at Paper Issues and was featured on their blog yesterday.


If you know me, I'm not a prolific "journaler" (is that a word?), but I had a lot I wanted to remember about this fun little jaunt. Seems so long ago, and like yesterday...all at the same time. How is that possible?! Guess that's why we scrap, to remember the good times a little more clearly.


Thursday, May 22, 2014

A Flatlander's Fascination

A window seat is the ONLY way to go! I love to watch the world in miniature below me as I fly, and I snapped a photo of the mountainous snow-covered landscape from the airplane window as I flew from New Orleans to Seattle last year. I thoroughly enjoyed the view, and had a crick in my neck by the end of the flight! Here is how I scrapbooked that picture:


The page is a mix of Basic Grey, October Afternoon, and Simple Stories travel-themed papers, chipboard, die-cuts and flair. 


The mountains were pencilled in and watercolored, their peaks highlighted with shimmery Stickles glitter glue! The plane is a stamp from American Crafts/Amy Tangerine.


I love those grey fabric Thickers, and the casualness they add to my page.


As a flatlander, AND a southerner, I never get to see such beautiful snow-covered peaks. This is just one more reason it's worth the extra $ for Early Bird check-in when flying Southwest Airlines. I need that window seat!


Thursday, March 27, 2014

Trip Through Time

The layouts I've created with this month's Scraptastic kit are a real trip through time! They span several years. The page I'm sharing today features a snapshot from Chuck E Cheese, back when my middle son was about 5 or 6 years old. It was one of those pictures that pops out of the machine, printed on flimsy paper, with that accidentally distressed and already faded look. After years of sitting in a box, it was even worse. I rescued this one, scanning, adjusting and reprinting it for use on my page.


I even had saved one of our old tickets and tucked it alongside the photo.


There we are, cheesy grins and all! I can't believe that little boy is now a junior in college!

Friday, November 8, 2013

In Real Life

Several months ago I had the chance to visit with some scrappy friends on the west coast, most of whom I have known for years. With the exception of one, I had never met them in real life! I was in the Seattle area for a Fair Trade workshop and added on an extra day so that I could meet the girls at the beach. We had SO much fun. 

After lunch on the day of my departure, we had a group picture taken by the restaurant's friendly hostess. It was a bit blurry but still a treasure. Here we are, together, in real life.


We sure packed a lot of fun in those last 24 hours. (The other girls had the whole weekend.)


Then off again to catch my plane.


Supplies: Patterned paper-October Afternoon, Simple Stories. Chipboard-Crate Paper, Basic Grey. Labels-Jenni Bowlin, October Afternoon. Brad-Simple Stories. Flair-Basic Grey. Bitty bag-Webster's Pages. Letter stickers-October Afternoon. Sheer letters-Heidi Swapp.

 Good friends, good food, and a couple of art projects to top it all off. In fact, I'll have to share those projects one day!

Friday, May 10, 2013

Mickey & Mary

No, I'm not sharing a Disney page today, but I am sharing a page about a Mickey Mouse namesake...my mother! Yes, she was the "little boy" in the photo on the layout below. When she was a wee tot, my grandmother's best friend thought she resembled in a small way (maybe it was the ears?) the mouse from the Walt Disney cartoons. And that's how her Mickey nickname came to be.

I love this sweet photo of my mother and her sister. And yes, when I first saw the picture many years ago, I thought the "boy" in the photograph was my uncle. But then I was enlightened.


On this layout, the sepia photo was highlighted with lots of yellow and gold accents.


There is smattering of gold mist, gold fiber on the tag, gold antennae on the butterfly and a gold charm...all adding a nice amount of sparkle to the page.
 

There are numerous yellow accents as well. The wood veneer butterfly and bird were pressed into an inkpad, one of my favorite ways of adding color to them. And I love the unsuspected bits of turquoise, especially the flowers.

I'm glad I have this photo of my mom and her older sister, and happy to have this page added to my albums for future generations to treasure as well.

Monday, March 4, 2013

Pontchatoula Berries

One day pretty soon, my husband will call and ask if I want him to bring home a flat of berries. He'll be driving through the Pontchatoula area (home of the Louisiana Strawberry Festival) and spot them for sale on the side of the road. When the prices are just right, and the berries the freshest and juiciest, he'll take some home. It's almost that season...and I can't wait. We'll make smoothies every afternoon, freeze some of the berries for later., and of course we'll have plenty for simply munching. Add a little evaporated milk and sweetener, and you have a delicious dessert! Usually the berries disappear so fast, that I miss taking a picture. Last year I snapped this:


A little Pinterest inspiration was used for the woven basket pieces (although today's berry baskets are green plastic) on which I placed a painted chipboard strawberry (Maya Road),


and a couple of flowers.


Patterned papers are from October Afternoon, Simple Stories (tickets and bingo card), and Jillibean Soup (Berry Jam label):


Other supplies include Liquid Pearls, Prima flowers, Jenni Bowlin milk cap, ribbon, thread, heart pin, ink, border punch (Martha Stewart), and letter stickers (Doodlebug, KI Memories).

Is your mouth watering yet?

Sunday, November 11, 2012

Layering, Stacking, and Overlapping

In assembling a collection of elements on a scrapbook page or card, it is visually appealing to layer, stack, and/or overlap the embellishments. November's Scraptastic kits gave me plenty of fodder for layering. Here is a page created with The Skies Are Grey main kit.

This layout shows just how much one single piece of paper can do: large strips back the photo, flowers are punched, hand-cut hearts are strung across the top of the page, and a few small strips form a banner over the journaling block...and all from one sheet of patterned paper! 


Notice how the flowers overlap each other, as do the hearts, banner pieces, and the tag, tabs and flag above the photo. Everything is layered.


A couple of Mickey-eared globes were cut from white cardstock and placed among the hearts.


Finally, flowers were punched from several of the patterns and arranged to form a pretty coordinating cluster. 

Scrapbooking these pages of our family vacation take me back to those wonderful days at Walt Disney World, Mickey's perfect world.

Wednesday, October 24, 2012

Packed 2 Go Back

...Back to School that is. My middle son is not fond of having his picture taken, so to document this event, I had to be creative. Thus, it's a back to school layout featuring a photo of the packed car! The initial "A" and "Roll Tide" on the banner hint at his school...the University of Alabama. The guitar in the back of the van tells a little bit about the boy himself.


I began this layout with bits and pieces of October's Hall Pass kit from Scraptastic, adding bits and pieces from prior months' kits as well. I love finding uses for all those little leftovers: a tab here, a sticker there. Paper scraps fashioned into a banner finish the page off nicely.


 Packed 2 Go and off we went...to deliver Chris to his second year. Last I heard, he had 3 As and 2 A+s! WTG Chris!

Friday, September 14, 2012

An Eventful Day

I have a page to share, one which features Scraptastic's September Noted kit and a pretty picture of my middle son's fraternity house. You can skip ahead to the layout and closeups...or read the backstory below. It was an eventful day, the day that photo was taken.

A week before classes began at the University of Alabama, we delivered Chris to his new abode, the Delta Sigma Phi fraternity house. From the outside, it looked so very elegant. Ha! Inside was quite a different story. Actually, the fraternity had switched houses this summer, and there was still a lot of renovation work going on. Nice new showers had been installed upstairs but the kitchen was still a work in progress. Classes would begin in a week and the workmen had not finished. We were even more surprised when we saw what was to be Chris' room for the next two semesters. Tommy thought it resembled a jail cell, with four cinder block walls and a sandy cement floor. Uh-oh. We piled all his stuff in one corner, where it would remain until he could rustle up a broom and dustpan and clean up! He'd need carpet or some kind of flooring. His bed was still on order. The desk and bookcase had to be put together. Whew! Quite a lot of work still needed to be done to make this place a home. 

But we couldn't dally.

We had to get back home.
 
While we were driving up to Tuscaloosa with Chris, Brendan was back home navigating the world of doctors, lab tests, cat scans and insurance forms. We were being constantly updated by phone. The pain he had during the night (he assumed it was something simple like a UTI or kidney stone) was determined to be appendicitis. The doctor would operate tomorrow. TOMORROW?! As I know it, an abscessed appendix needs removal ASAP, before it gets worse and bursts. So we called a surgeon friend of ours who questioned the wait as well. Thankfully he took over the case, and scheduled surgery right away. We were crossing the Mississippi/Louisiana state line when Bobby called to say he was beginning the operation. It would take about 45 minutes. 

We drove straight to the hospital, and sure enough, they had just finished up. Everything had gone well.

(A couple of days later, Chris had installed a wood-look laminate tile floor in his room, and Brendan was resting comfortably at home.)

Here's my page, with the deceptively elegant facade of the Delta Sigma Phi house. A month later, with the renovations complete, the common rooms newly furnished, and Chris' room set up, it should now look less like Animal House. I'll definitely need pictures.


Punching a border, the triangular scraps caught my eye and ended up as confetti on my page:


I love how these wood veneer pieces help to tell my story:


There's a bit of misting, inking, and stamping going on here:


Patterned papers are Studio Calico, bits and pieces are Elle's Studio, and flags are October Afternoon. Almost everything on this page comes from the Scraptastic September kit, Noted. Exceptions are the car veneer and number strips which were in Scraptastic's September kit, Just Beachy, and the foam letters from American Crafts.

Wednesday, September 12, 2012

Rainbow


With the B sides of Echo Park's Paradise Beach collection papers splayed out on my desk, I recognized a virtual rainbow of richness. The deep colors of the collection, and the fact that I had captured a beautiful rainbow over the beach this summer, inspired me to recreate this color spectrum on my scrapbook page! After arranging the colorful strips of patterned paper, I filled in the left side with corresponding tidbits of color-bingo cards, stickers, die-cuts, fussy-cuts, ticket stubs, labels, chipboard, and more.

Placing this box of color slightly to the top of the page gave me extra room along the bottom for a title. But oh...what to do now? I tried EVERYTHING in my stash. I even used a rainbow assortment of distress inks on white foam Thickers. But they looked too washed out for my brightly colored page. I was down to my last idea and it was this: Why not use the same premise for my title letters? It would certainly match if I used the SAME papers to back a negative cut word...so that's what I did.  Here's a closeup:


And here's the finished page:


It was fun choosing and arranging my colorful accents:


I just LOVE colorful scrapbook pages, and this one is a fave!

Thursday, July 26, 2012

Bermuda Longtails

See, I found another spot to use those little wooden birds! It wasn't much of a stretch to find a place for one on this page. It's about birds actually.

On our walk about the town of Hamilton, Bermuda, we stumbled into a beautiful park, Par-la-Ville Park, since renamed Queen Elizabeth Park, and happened upon a statue depicting a flock of these longtails. Another day, we spotted several flying alongside the boat that was taking us to a cycling activity. The really cool thing about the second picture on the page is that it not only shows the birds in flight, but their nesting site on shore as well. The white "igloos" that you see are artificial nests cemented into the rock, where the natural holes and crevices that would normally hold their nests have been lost to erosion. The birds make do quite well with these substitute nests and their numbers are increasing. Although the Bermuda longtail isn't the national bird of Bermuda, it is often associated with the island.


I set out to use  Sketch #92 from my friend Susan Stringfellow's Sketch Savvy Blog and it gave me a great start to my page. It's such a lovely design, one which I plan to use again.


Did you notice the trio of bird embellishments on this page: the wood veneer bird from Studio Calico, the "Fly Away" snippet from BasicGrey's clipping collection, and bird stickers from American Craft's Dear Lizzy sticker book? I love when I can employ embellishments that help to tell the story!

(Patterned papers are a mix of October Afternoon's 9 to 5, Crate Paper's Story Teller, and BasicGrey.)

Tuesday, July 24, 2012

His First Specs

For many months now I've been whining about the lack of scrapbooking paper with blue, true blue, real blue...not denim or turquoise or aquamarine. Tired of waiting, I picked up this collection from October Afternoon and decided to go with it. The 9 To 5 collection does have a tad of blue in a few of the papers and I hoped it would look OK with the photo I had been saving for those perfect blue papers that never materialized. I shouldn't have been worried!

Two patterned papers from Crate Paper were brought in to go with the soft greenish-yellow (gold?) color in the houndstooth, stripe and diamond printed papers from 9 To 5 collection. The golden yellow doily print was chosen for the background and a little bit of the alphabet paper was tucked alongside and beneath the photo. I had some embellishments cut from a 9 To 5 paper, a tag and journal spot from Crate Paper, a wooden potty person, chipboard beaker, and a couple of stickers to arrange as accents to my page. Everything was coming along fine. And then...

I carefully peeled off the backing of an ancient 7-gypsies fabric label...and accidentally dropped it...directly onto my (already adhered) photo. ACK! Just when you are wishing the old adhesive would fail, it proves to be perfectly preserved and the most tacky sticker I've ever encountered is stuck firmly to my picture. I was able to carefully peel it off the photo, but it left a big old sticky residue of adhesive which couldn't be rubbed off no matter what I tried. Everything came to a screeching halt until a replacement photo could be printed and picked up from Sam's.

Finally, here is the completed page:


I just love this photo of my youngest son, which is why I was so particular about how it was scrapped. He was all dressed up for my niece's wedding and sporting his brand new glasses. This was his first pair and they complimented him well. He was so shocked when the optometrist instructed him to wear them all the time, not just when he needs to see something in the distance. We didn't realize his eyes were so bad either. Thankfully, it didn't take too long for him to adjust. Now they're just another part of him.

Tuesday, July 10, 2012

Studio Backlot Tour

This attraction is one of our favorite at Disney's Hollywood Studios in Orlando. (See, guys, I said it correctly!) This was our first trip back to WDW since the name change and old habits are pretty hard to break. I quite often referred to the place as MGM by accident, and got reprimanded from the kids every time.
We love this ride so much that we had to experience it twice, and each time I snapped dozens of photos. Not only are there lots to see and experience, but it ends with a relaxing tram ride...once you pass Catastrophe Canyon...and that's my favorite part. Whenever you are given the chance to sit in one place and be entertained at WDW, I'm all for it. Here are three of our crew ready to check out the Studio Backlot Tour for the second time.


I have been longing for a "real" blue for quite a while and one of the blue diamonds and a skinny line in the plaid of this newest paper collection from October Afternoon, are pretty close. It also nice when older paper scraps can be mixed in with the new. In this case, I was able to work in some O. A. Boarding Pass, Rocket Age and Road Trip. My title is a mix of chipboard letters (a T. J. Maxx find), rub-ons, and a negative cut paper backed with cardstock. 


Next I need to pull out some of my photos from this "tour" and scrap them as well. It should be a lot of fun to work with those pictures. :)


Tuesday, June 19, 2012

It Happened When...

Chris took a small point and shoot camera with him on his mission trip to Mexico, but he didn't manage to get in front of the camera very often. I do however have tons of pictures, videos even, of the poor pig that became dinner one evening. I am not kidding. There were probably 50-60+ pictures AND video clips of that disturbing episode. It must have been the highlight of his trip. The guys drew straws for the honor of wielding the knife. Then they proceeded to take photos of the entire process, from gutting to roasting on the spit. Boys!

I was particularly happy to find these great photos of my son on the same memory card. Thankfully he had one of his friends snap pics of him leaning against one of the Aztec pyramids on the day their toured the area. Finally, a pleasant subject for me to scrap. In spite of his slightly apathetic attitude towards picture-taking and scrapbooking, I believe that there will come a time when Chris will be glad that I've preserved these memories for him. If not, well I at least had fun creating this page. ;)


Papers and stickers are a mix of Crate Paper, Studio Calico, Echo Park, and October Afternoon. Large letter stickers are October Afternoon (blue) and BasicGrey (red). Small letter stickers are Making Memories.


Monday, June 18, 2012

Dine Around The World-Dessert Style

When Kevin was a baby, we took a trip to Walt Disney World one summer, and all seven of us squeezed into a cabin at the Fort Wilderness Resort. It was a really cool place actually. The kids got a kick out of the Murphy bed in the living room. It was pulled down from the wall every night, with Tommy and I as bookends and Kevin in the middle. The other four kids settled into the bedroom, girls sharing the double bed and boys climbing into the bunks. It worked. We loved the peace and quiet of the area with no banging doors or noisy hallways to keep us awake. Well, it WAS quiet until the free-roaming peacocks started up their cawing. Thankfully the beautiful creatures slept at night.

But the greatest amenity and the real reason we chose to stay in the cabins that year was the kitchen. With the full-sized refrigerator, microwave, stove, dishwasher, coffeemaker, and cabinets full of equipment, we didn't have to rely on expensive Disney dining. And we didn't have to worry about finding food that the baby would eat. We also didn't get to do things like Dine Around the World. At least not that year.


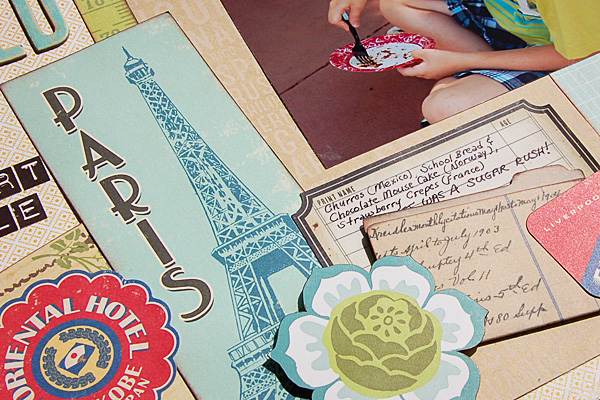
When I first heard of this idea, to dine in bits and pieces from one end of Epcot's World Showcase to the other, it sounded like an awesome plan. It was something I wanted to do when we vacationed at Walt Disney World last spring. We could get this and that, sharing and tasting all sorts of ethnic fare. Unfortunately, the rest of my crew wasn't impressed with the idea, so that evening in Epcot after eating regular dinner fare, I persuaded them to try the mini Dine-Around, desserts only. It wasn't hard to convince 11 year old Kevin! He eyed up the Chocolate Mouse Cake a couple of days earlier and couldn't wait to try it. I wasn't quick enough with my camera though and the only pictures I had to scrap were of him scraping the crumbs from his plate. Dine Around-Desserts...what a cool idea!


Churros in Mexico, School Bread in Norway, and Strawberry Crepes in France rounded out our dine-around. Next time, we go all out. :)